
Thanks to https://twitter.com/DaK_74/status/494106598076604416/photo/1 @DAK
Thanks to https://twitter.com/DaK_74/status/494106598076604416/photo/1 @DAK

Credit to http://cheneyagilitytoolkit.blogspot.co.uk/2014/06/ticket-master.html and @stacemeaney
Resources:
See above for image.
What to do:
These tickets can be used to differentiate and also to encourage self and peer-assessment.
Each student will take 3 ‘learning journeys’ during the lesson.
Every time an activity or ‘journey’ is completed and assessed, it should be hole-punched, in a similar way, to the way a railway ticket is punched by an inspector.
Students can be differentiated for, by planning different journeys.
The attached example was differentiated three ways within a mixed ability year 8 group.
Variations:
Could be easily adapted as an exit pass, where there is a self-assessed task, a parent-assessed task and then a teacher-assessed task!
Have a couple of sets of these handy.
Colour code them in order of difficulty.
Students are free to choose their level of difficulty.
OR
Use these as Thinkers Keys for students to complete in lesson.
@msnurscience here you go 🙂 http://t.co/mIF5UWGaE7—
Stuart J. Bryson (@WhyAyeBiology) July 25, 2014

Produce a wordle of key words http://www.wordle.net/create.
Students choose 5 pairs of keywords that they can match and write them on their hexagons.

See below for the full blog.
http://ianmcdaid.wordpress.com/2013/11/05/wordles-and-solo-in-unison/
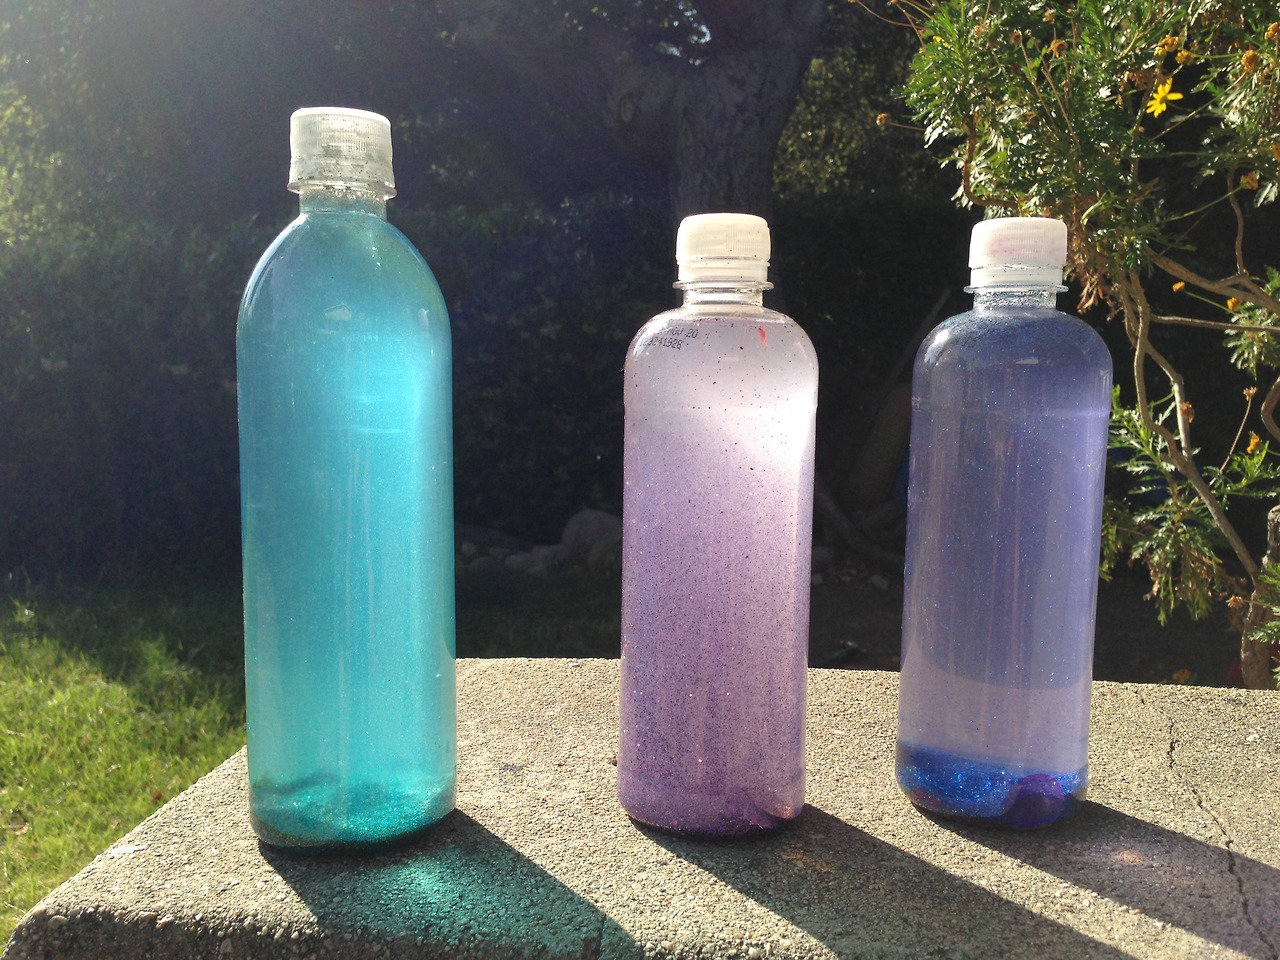
http://kniterly.tumblr.com/post/49989284322/uclamsw-calm-bottle-aka-glitter-jar-goal
Goal: Anger management; Decreasing anxiety, fear, etc.; Aggression/anxiety physical release
Supplies
– Container: This is typically made with a glass mason jar, but since I often make these with children I use water bottles with smooth sides.
– One bottle of clear glue (not white glue that dries clear), corn syrup, or glitter glue. I like using regular glue so I don’t have to deal with the hot water since I make these in my office.
– Water: It can be room temperature if you use regular glue but should be hot if glitter glue is used. If the water is not hot enough then the glitter will become clumpy and separate.
– Glitter: I use mostly super fine glitter with a little regular sized. I sometimes add sequins, beads, shells, plastic jewels, etc. Glow in the dark glitter looks really cool if you can find it. Less (or even none) is needed with glitter glue bottles
-Food coloring: This is optional. Only use one drop or it becomes difficult to see the glitter.
– Strong glue or duct tape: This is used to fasten the lid to the container. I like using colored duct tape.
Directions
– Making a Calm Bottle (clear glue or corn syrup): Fill the bottle 3/4 of the way full with water. Then add the glue (or corn syrup) and glitter. The more glue you use, the longer it will take the glitter to fall. I usually use the whole bottle. Add 1 drop of food coloring, if desired, and then glue/tape the lid on.
– Making a Calm Bottle (glitter glue): Instead of clear glue you can use glitter glue. If you go this rout then mix the glitter glue in a bowl with very hot water before adding it to the bottle. If the water is not hot enough then the glue will clump up and not work. You can add 1 drop of food color and additional glitter is desired.
-Using a Calm Bottle: I definitely suggest making this with your client, rather than for them. It is fun to make, they can personalize it, it will mean more to them and they will be much more likely to use it. When your client becomes upset, angry, frustrated, anxious, etc., direct them to shake the bottle vigorously as long as they want as an aggression/anxiety physical release activity. When they are finished they set the bottle down and watch the glitter fall as they use their favorite coping tool and/or deep breathing exercise.
-Other uses: This is a common coping tool used for people who self-harm and is easily adaptable to many clinical issues. I have also used this as a coping tool + timer for kids who are transitioning into sleeping in their own bed or have trouble focusing and are taking long breaks during homework. It is a highly adaptable to numerous therapeutic goals.

Quick activity / competition at the beginning of a lesson. Stick the QR codes around the room. Students use a (free) QR code reader on their phones to read the questions and write down the answers. First to get all ten correct wins.
#pedagoofriday Y10 carrying out peppered moth simulation and using keywords to explain natural selection. http://t.co/NeBwwzaGA4—
SThaw (@aegilopoides) February 14, 2014
Purchase the stamp from Hobby Craft


